Table of Contents
Broken Sony PS4 Controller Repair
Dealing with a broken Sony PS4 controller can be a frustrating experience, especially when you're in the middle of an intense gaming session. While one option is to buy a new one, this can be expensive. The best part is that many of these common issues can be resolved with the right tools and some patience.
First, it's important to identify the issue with your controller. Whether it's unresponsive buttons, stick drift, or a faulty battery, knowing the problem will help you determine the best course of action for repairing it.
Equipped with the right tools and some technical know-how, you can often avoid the cost of professional repair services and fix your Sony PS4 controller on your own.
Required Tools for Controller Repair
So, before going into how to repair a broken Sony PS4 controller, let’s look at some of the critical tools that you need for this task.
Phillips Screwdriver
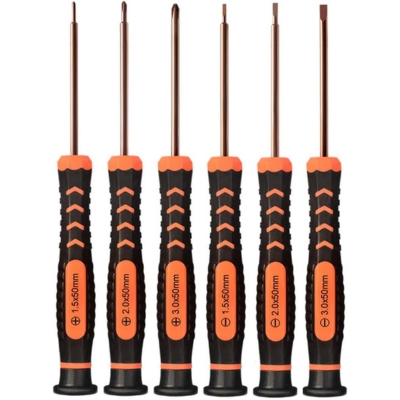
The Phillips Screwdriver is a tool used for removing screws from the PS4 controller, essential for opening the shell without damaging screw heads.
- Purpose: To remove screws and open the controller's shell.
- Benefit: A quality Phillips screwdriver prevents the stripping of screw heads and damage to the shell.
Opening Pick
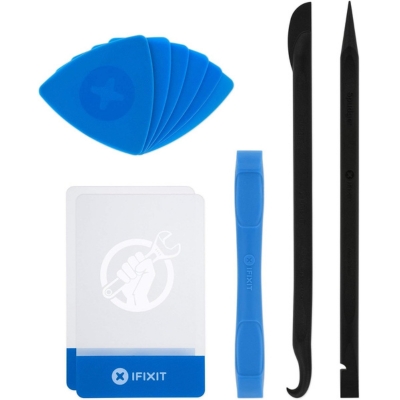
The Opening Pick is a thin, flexible tool designed to gently pry apart the controller's shell after unscrewing, minimizing additional damage.
- Purpose: To pry open the controller's shell after loosening the screws.
- Advantage: The thin, flexible edge helps in creating a gap between plastic parts without causing damage.
Spudger Set
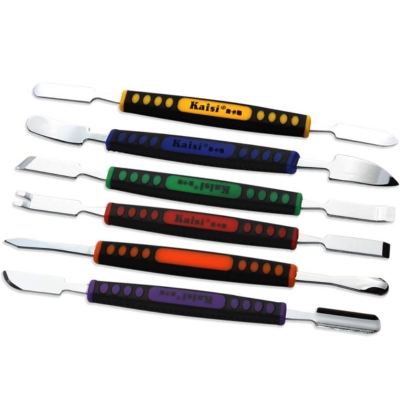
The Spudger Set is a collection of non-conductive, plastic tools used to safely maneuver delicate internal components of the controller, especially useful for disconnecting fragile connectors.
- Purpose: For maneuvering delicate internal components of the controller.
- Importance: These non-conductive plastic tools are essential for safely prying, lifting, or repositioning fragile parts and are crucial for disconnecting connectors from the motherboard.
Magnetic Project Mat/Small Containers
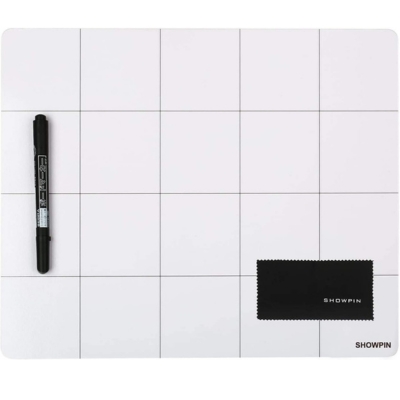
The Magnetic Project Mat/Small Containers is an accessory used to organize and secure small parts and screws during the repair process, preventing loss and confusion.
- Usage: To keep track of screws and small parts.
- Advantage: Prevents loss of small components and helps in maintaining organization during the repair process.
Repairing a Broken Sony PS4 Controller
Repairing a PS4 controller can be a cost-effective solution compared to buying a new one. Safety and careful handling are paramount during this repair process. As noted earlier, it’s important to identify the issue with the controller and repair it accordingly.
That being said, let’s walk you through some common issues and how to repair them.
1. Stick Drift
Issue Description: Unintended movement of analog sticks.
Repair Procedure:
- Disassemble Controller: Carefully open the controller by removing the screws at the back. Be mindful of the internal ribbon cables.
- Clean Analog Stick Mechanism: Use compressed air or a small brush to remove dust and debris around the analog sticks.
- Check and Replace Analog Module: If cleaning doesn’t help, consider replacing the analog stick module. This part can be purchased online.
2. Unresponsive Buttons
Issue Description: Buttons not registering or responding.
Repair Procedure:
- Open Controller: Same as Step 1 of Stick Drift.
- Clean Button Contacts: Use isopropyl alcohol and a cotton swab to clean the underside of the buttons and the contact points on the circuit board.
- Check Rubber Pads: Ensure the rubber pads beneath the buttons are intact. Replace if necessary.
3. Loose or Damaged Cables
Issue Description: Charging cable or cable connections are faulty.
Repair Procedure:
- Inspect USB Port: Look for any physical damage or debris in the USB port. Clean gently if needed.
- Check Internal Connections: Open the controller. Inspect and securely reattach any loose cables, especially the battery connector.
4. Battery Problems
Issue Description: Rapid battery drain or difficulty holding a charge.
Repair Procedure:
- Replace Battery: Open the controller. Disconnect the old battery and replace it with a new one. Batteries are readily available online.
5. Connectivity Issues
Issue Description: The controller is not connecting to the console.
Repair Procedure:
- Reset Controller: Use a small pin to press the reset button located at the back of the controller.
- Repair Controller: Connect the controller to the PS4 with a USB cable and press the PS button to repair it.
6. Physical Damage
Issue Description: Cracks, broken casing, or physical damage.
Repair Procedure:
- Assess Damage: Check the extent of physical damage. Minor cracks can be glued.
- Replace Damaged Parts: If the casing is severely damaged, consider purchasing a replacement shell and transferring the internal components to the new casing.
General Tips:
- Organize Screws: Keep track of screws and their locations when disassembling.
- Be Gentle: Handle ribbon cables and internal components with care to avoid further damage.
- Testing: After each repair, test the controller to ensure it functions correctly.
Safety Note: If you are not confident in your ability to repair electronic devices, consider seeking professional assistance. Mishandling internal components can lead to further damage or injury. Again, check out the step-by-step procedure for solving your Broken Sony PS4 controller in this video.
Disassembling the Controller
In this section, we'll guide you through the process of disassembling your PS4 controller for repair. This will involve several steps, which are broken down into easily digestible sub-sections for your convenience.
Remove Rear Case
To begin, you'll need to remove the rear case of your controller. This involves carefully releasing the plastic clips that hold the case together. You might want to use a flathead screwdriver or a plastic opening tool to gently pry apart the two halves of the controller.
Detach the Battery
Next, you'll need to disconnect the battery from the controller. Locate the battery and gently lift it upwards, being cautious not to pull on the battery cable. This will free the battery, allowing you to set it aside while you continue with the repair process.
Disconnect the Interconnect Cable
The interconnect cable is responsible for communication between the various components of your device. You'll need to disconnect this cable to continue the disassembly. This can be done by gently lifting the connector upwards using tweezers or a similar tool.
It's crucial to be gentle during this step, as a broken interconnect cable can be challenging to replace.
Uninstall the TouchPad and Extension Port
The touchpad is a sensitive component. As such, care should be taken when removing it from your controller. First, disconnect the touchpad cable that connects it to the motherboard. You can then remove the extension port by gently prying it out of place.
Take Out the Action Buttons
Now that you've dismantled the main system components, it's time to remove the action buttons and fix them (L1, R1, and the triggers).
Use tweezers or a similar tool to carefully lift each button out of the main body of the controller. Set the buttons aside, making sure to keep track of their order, so reassembly will be a breeze.
Extract the Motherboard
The final step in disassembling your PS4 controller is removing the motherboard. Gently lift the motherboard out of the device's casing and set it aside. Be careful not to damage any attached cables. Now you're ready to assess the damage and start making repairs.
This table gives you a clear step-by-step procedure for disassembling and assembling a broken Sony PS4 controller for repair:
Reassembling the Controller
Reassembling your PS4 controller may seem like a daunting task, but with a little patience and the right guidance, you can have your device back in working order in no time.
Before you begin, ensure that all the components are clean and free of any debris. Once ready, start with the reset button extension that you may have disassembled earlier in the process.
This small piece connects the internal reset button to the external button on your controller's backside. Gently press the extension into place, making sure it aligns correctly with both the internal and external buttons.
Now it's time to reattach the battery bracket. Carefully position this piece atop the battery and secure it using the original screws. Be cautious not to overtighten the screws, as this can damage the bracket or other components.
Next, connect the battery to the PS4 controller's main circuit board. Ensure the wire is properly connected and fully seated to avoid any power issues. Once the battery is connected, double-check that no other wires or parts are out of place before proceeding.
Reconnect the USB cable between the controller's main board and the charging port. This crucial step ensures your controller can recharge as needed and maintain a connection with your console. Make sure the cable is securely connected and positioned correctly within the controller shell.
With all components reconnected, carefully align the front and back halves of your controller's shell and gently press them together. You should feel the pieces click into place, but if you encounter resistance, reinspect the interior to ensure there's no obstruction. Once the shells are connected, reattach any remaining screws to fully secure your controller.
To complete your reassembly, test the controller by connecting it to your PlayStation console using a USB cable. Once your device is recognized, press the PS4 button to confirm that all components are functioning correctly. You can then disconnect the cable and test the wireless connection as well.
Solutions for Specific Issues with Your Sony PS4 Controller
If your Sony PS4 controller is malfunctioning, it's vital to identify the issue and find an appropriate solution based on the warranty.
Firstly, let's discuss issues with the headphone jack. If you experience inconsistent audio or no sound at all when using headphones with your PS4 controller, it could be due to a faulty headphone jack.
You can try a different set of headphones or a different controller to see if the problem persists. If it does, you may need to seek a repair service to fix the issue.
On the other hand, if the vibration motors in your controller seem to be off or not functioning, first check your controller settings on the console to ensure the vibration feature is enabled. If the issue still persists, it's possible that the vibration motors are either damaged or have some loose connections.
Now let's talk about other common issues. One frequent problem is the inability of the controller to charge. This can be due to a faulty USB cable, battery, or charging port. First, try using a different USB cable to charge the controller.
If that doesn't work, make sure the charging port is clean and clear of debris. If the issue still persists, you might have to consider replacing the battery or seeking a repair service.
Additionally, if your controller buttons seem unresponsive or sticky, there could be some dirt or debris buildup causing the issue. To resolve this, you can first attempt cleaning the controller buttons with a cloth and rubbing alcohol. If cleaning doesn't do the trick, you may need to seek a professional controller repair service to fix the buttons.
Recent Articles